Dry chicken usually isn’t a seasoning problem—it’s a temperature problem. Cooking meat “by time” or “by color” is how most home cooks end up overcooking. A meat thermometer fixes that fast—if you use it correctly.
Below is a practical, experience-based guide to using a meat thermometer the right way: where to insert it, when to check, what temperatures actually matter, and how to keep meat juicy.
Why a meat thermometer matters (real talk)
- Meat keeps cooking after you remove it from heat
- Color is unreliable (especially chicken and pork)
- Even a few degrees too hot = dry meat
A thermometer lets you cook to doneness, not past it.
The basics: types of meat thermometers (quick)
You don’t need to obsess over gear, but knowing the type helps:
- Instant-read thermometer → quick checks during cooking (best for most home cooks)
- Probe thermometer → stays in meat during cooking (great for roasts, ovens, grills)
- Dial thermometer → slower, less precise (works, but needs patience)
This guide works for all of them.
Step 1: Where to insert the thermometer (this matters most)
The golden rule
👉 Always measure the thickest part of the meat, away from:
- bone
- fat pockets
- the pan or grill surface
Common mistakes (and how to fix them)
- ❌ Touching bone → reads hotter than the meat
- ❌ Too shallow → reads surface temp, not inside
- ❌ In the wrong muscle → inaccurate doneness
Specific tips by protein
- Chicken breast: insert from the side, straight into the center
- Whole chicken: deepest part of the breast and the thigh
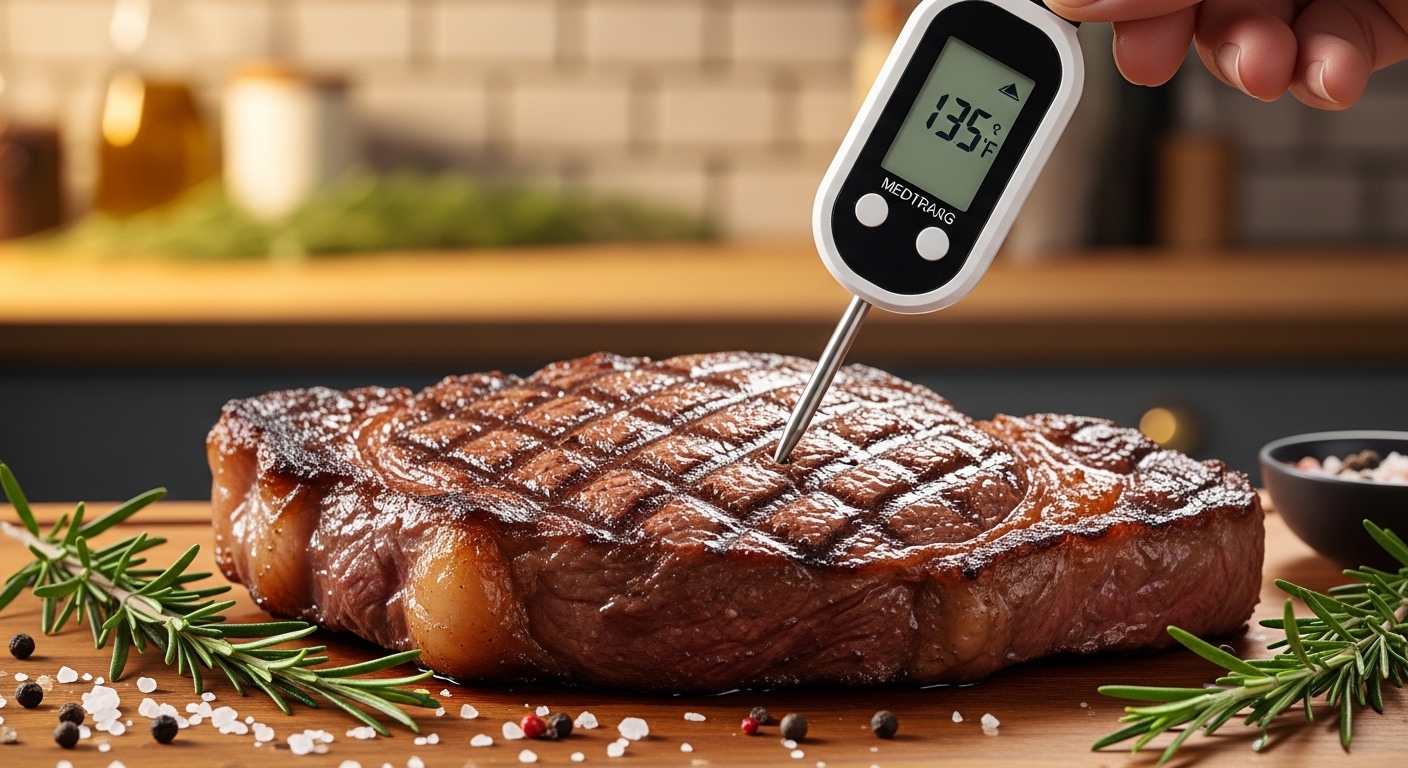
- Steak: center of the thickest section
- Pork chops: center, not touching bone
- Ground meat: probe straight down into the middle
Step 2: Know the safe temperatures (but don’t stop there)
USDA-safe minimums (baseline)
- Chicken (all parts): 165°F / 74°C
- Ground meats: 160°F / 71°C
- Pork: 145°F / 63°C (with rest)
- Beef & lamb steaks: 145°F / 63°C (medium)
⚠️ These are safety numbers, not “best eating” numbers.
Step 3: How to avoid dry chicken (the most important section)
The mistake
Cooking chicken to 165°F on the heat.
What actually happens
- Chicken continues cooking after removal (carryover cooking)
- Pulling at 165°F often means it ends up at 170–175°F
- That’s where moisture loss happens
The fix (this changes everything)
👉 Pull chicken at 160–162°F, then let it rest
It will naturally rise to 165°F while resting—and stay juicy.
Real-life experience
Once you start pulling chicken before the final number, you’ll notice:
- Juicier breast meat
- Less stringy texture
- Better reheating the next day
This alone solves “dry chicken” for most people.
Step 4: Timing your temperature checks
When to check
- Start checking early, especially with thin cuts
- Check again every 30–60 seconds near doneness
Why this matters
Meat doesn’t go from undercooked → perfect → dry slowly.
Near the end, it can jump 5–10°F fast.
Thermometers are for anticipation, not confirmation.
Step 5: Fast, accurate readings (practical tips)
- Insert the probe at least ½–1 inch deep (depending on cut)
- Wait for the number to stabilize, not just appear
- If readings vary, take two spots and trust the lower one
For thin foods (burgers, chops), angle the probe sideways to hit the center.
Step 6: Resting meat (non-negotiable)
Resting allows:
- temperature to finish rising safely
- juices to redistribute
Simple resting guide
- Chicken breasts: 5 minutes
- Steaks: 5–10 minutes
- Roasts: 15–30 minutes
Cutting immediately = juices on the board, not in the meat.
Common thermometer mistakes (and quick fixes)
| Mistake | Fix |
|---|---|
| Only checking once | Check early, then again near finish |
| Trusting color | Trust temperature instead |
| Overcooking to “be safe” | Pull early + rest |
| Touching bone | Aim for center muscle |
| Not cleaning probe | Wipe with hot, soapy water after each use |
Quick reference: juicy targets (experience-based)
(Pull at these temps, then rest)
- Chicken breast: 160–162°F
- Chicken thighs: 170–175°F (they like it hotter)
- Pork chops: 140–142°F
- Steak medium-rare: 125–128°F
- Steak medium: 130–135°F
Final takeaway
A meat thermometer isn’t about being fancy—it’s about control.
If you remember just three things:
- Measure the thickest part
- Pull early, don’t cook to the final number
- Rest the meat
You’ll stop overcooking, stop guessing, and finally get chicken that’s juicy every time.
If you want, I can also:
- Turn this into a short printable cheat sheet
- Write a thermometer-specific guide (instant-read vs probe)
- Add an FAQ section for SEO (how often to check, calibration, cleaning)